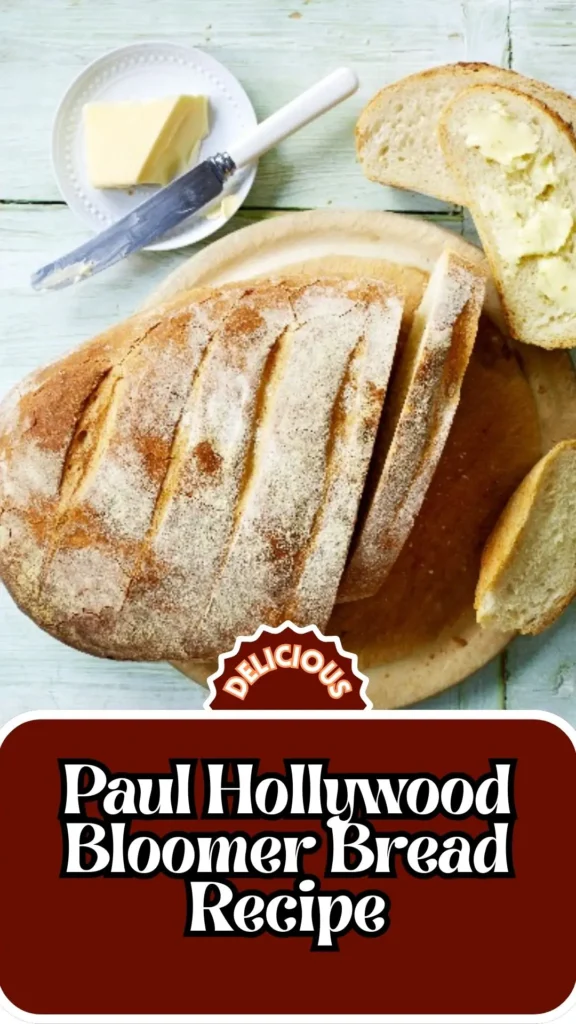
There’s something magical about pulling a golden, crusty bloomer from your oven-the kind that looks like it came straight from a proper British bakery.
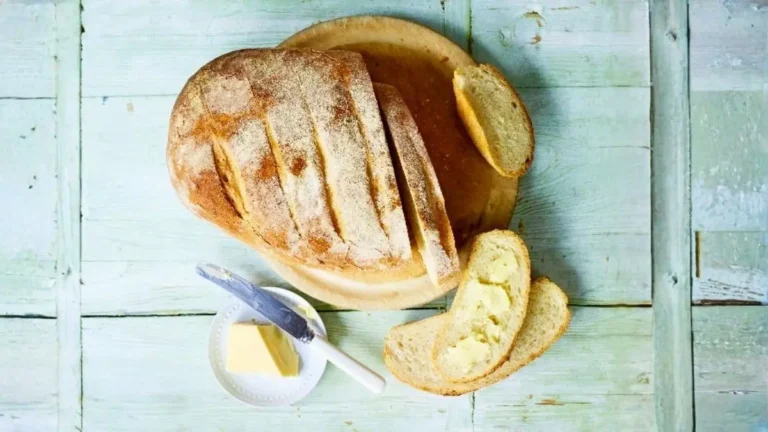
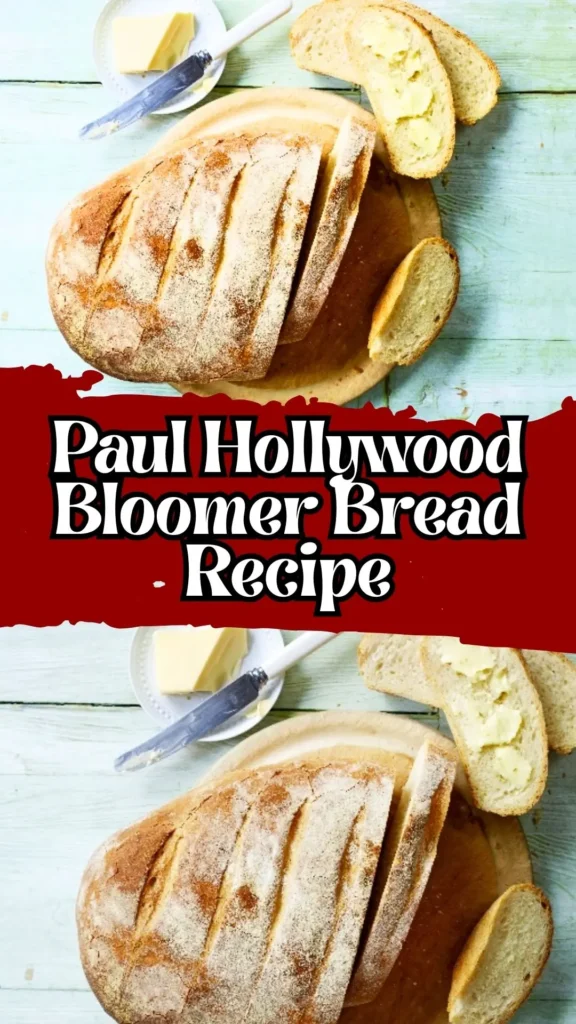
This Paul Hollywood bloomer bread recipe delivers exactly that: a beautifully shaped white loaf with a crispy, flour-dusted crust and soft, pillowy interior.
Whether you’re a Great British Bake Off fan or simply love artisan bread, this copycat Paul Hollywood bloomer bread recipe brings bakery-quality results to your kitchen.
With just a handful of basic ingredients and Paul’s expert techniques, you’ll create a show-stopping loaf that’s perfect for sandwiches, toast, or simply slathering with butter.
What Does Paul Hollywood’s Bloomer Bread Taste Like?
This white bloomer bread recipe Paul Hollywood style produces a loaf with mild, wheaty sweetness and a subtle tang from the slow fermentation.
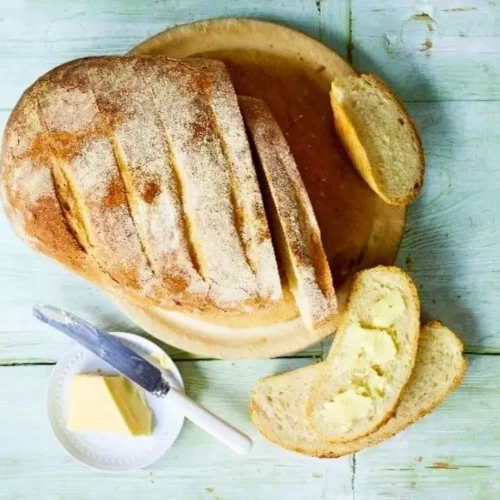
The crust shatters with each bite-crispy, golden, and deeply satisfying-while the crumb inside stays soft, airy, and tender with an open texture that’s neither too dense nor too holey.
The olive oil adds richness without heaviness, and if you’ve allowed a longer prove, you’ll notice complex, slightly nutty flavors that elevate this simple white bread above the ordinary.
It’s the kind of bread that tastes incredible fresh but toasts beautifully the next day.
Paul Hollywood Bloomer Bread Recipe Ingredients
Ingredients (Makes 1 Large Loaf)
- 500g strong white bread flour (plus extra for dusting)
- 7g sachet fast-action dried yeast
- 10g fine sea salt
- 30ml olive oil (plus extra for oiling)
- About 325ml cool or lukewarm water (start with 250ml, add up to 75ml more as needed)
- Flour, polenta, or semolina for dusting the baking tray
Kitchen Utensils Needed
- Large mixing bowl
- Measuring jug and kitchen scales
- Baking tray
- Clingfilm or clean tea towel
- Sharp serrated knife or bread lame
- Wire cooling rack
- Roasting tray (for creating steam)
- Water spray bottle (optional but helpful)
Preparation and Cooking Time
- Prep Time: 20 minutes (active kneading and shaping)
- First Prove: 1-3 hours (depending on room temperature)
- Second Prove: 45-60 minutes
- Baking Time: 30-40 minutes
- Total Time: Approximately 3-5 hours (mostly hands-off proving time)
- Servings: 1 large loaf (approximately 12-16 slices)
Paul Hollywood Bloomer Bread Recipe Instructions
Step 1: Mix the Dough
In a large mixing bowl, add the 500g strong white bread flour. Place the yeast on one side of the flour and the salt on the opposite side-keeping them separated prevents the salt from killing the yeast. Pour in 30ml olive oil and start with 250ml of water.
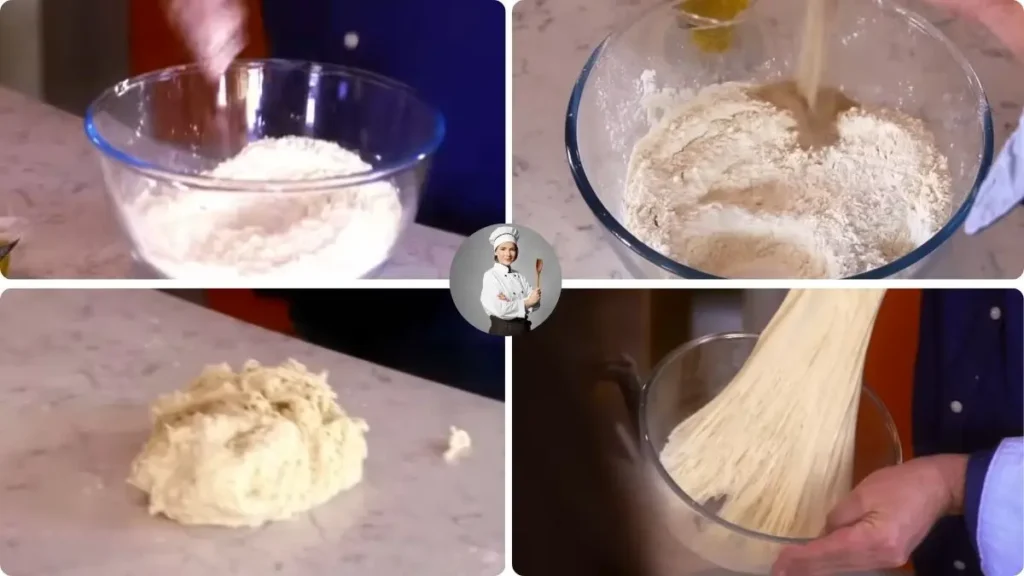
Using your hand or a wooden spoon, mix everything together, gradually adding more water (up to 75ml total) until the mixture forms a soft, slightly sticky dough that comes away from the bowl sides. The dough should feel tacky but manageable-resist adding all the water at once, as flour absorption varies.
Step 2: Knead the Dough
Lightly oil your work surface with olive oil (Paul prefers this over flouring, as it keeps the dough soft). Tip the dough out and knead vigorously for about 10 minutes. Use the heel of your palm to push the dough away from you, fold it back over itself, give it a quarter turn, and repeat. This develops the gluten structure. After 10 minutes, the dough should transform into a smooth, elastic ball that’s no longer sticky. Test readiness by stretching a small piece-it should form a thin, translucent “windowpane” without tearing.
Step 3: First Prove (Bulk Fermentation)
Place your kneaded dough into a lightly oiled bowl and cover with oiled clingfilm or a damp tea towel. Leave it in a warm, draft-free spot until it has at least doubled in size-this typically takes 1-3 hours depending on room temperature. For superior flavor development in this Paul Hollywood bread recipe bloomer, use cool water and allow a longer, slower rise. The dough is ready when you press it gently with a finger and the indent slowly springs back.
Step 4: Knock Back and Shape the Bloomer
Turn the risen dough onto a lightly oiled surface. Knock out the air by folding it over itself and pressing down several times until smooth. Flatten the dough into a rectangle with the long side facing you. Fold both long sides into the center so they overlap slightly, then roll the dough up tightly from the edge nearest you, like a Swiss roll. This creates tension for a good rise. Turn the roll seam-side down, tuck the ends underneath to create the characteristic bloomer shape (slightly tapered at the ends), and gently rock it back and forth to even out the shape.
Step 5: Second Prove
Transfer your shaped loaf to a baking tray that’s been dusted with flour, polenta, or semolina (this prevents sticking and adds texture). Cover loosely with a large plastic bag, oiled clingfilm, or tea towel, ensuring it won’t stick to the rising dough. Leave to prove until doubled in size again, typically 45-60 minutes. The loaf should look puffy and hold a gentle fingerprint when pressed.
Step 6: Prepare for Baking
Preheat your oven to 220°C (fan 200°C)/gas mark 7. Place an empty roasting tray on the bottom shelf-this will create steam for a crispy crust. Once the loaf has proved, lightly spray it with water using a spray bottle. Dust generously with flour and gently rub it in with your hands for that rustic, artisan appearance that defines a proper bloomer.
Step 7: Slash and Bake
Using a very sharp serrated knife or bread lame, make 4-5 deep diagonal slashes across the top of the loaf at a 45-degree angle. Cut decisively and deeply (about 1cm) for the slashes to open beautifully. Place the loaf in the preheated oven, then immediately pour about 100ml of water into the hot roasting tray below to create steam (be careful of the hot steam).
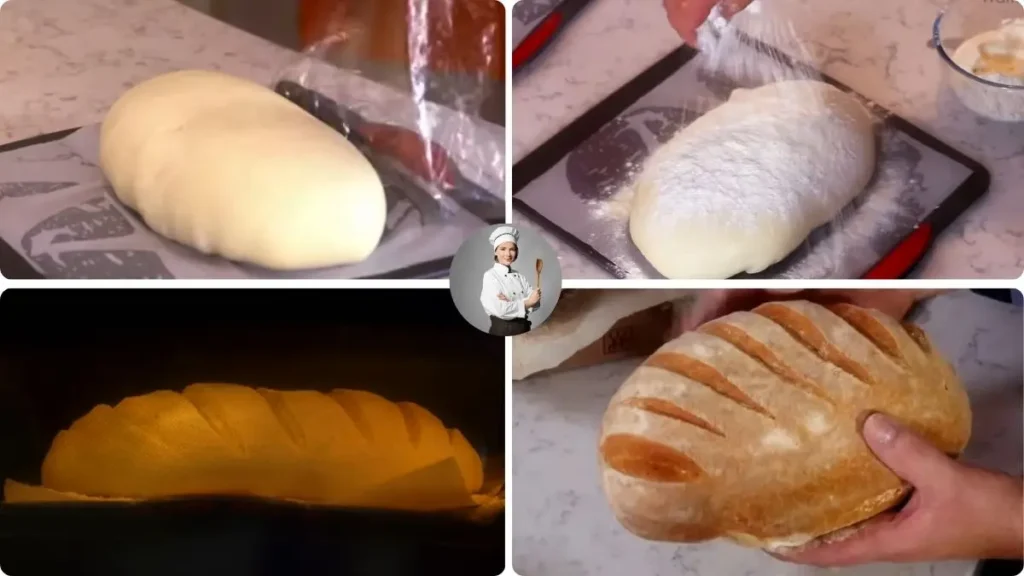
Bake for 20-25 minutes until deeply golden, then reduce the temperature to 200°C and bake for another 10-15 minutes if needed. The loaf is done when it sounds hollow when tapped on the bottom and reaches an internal temperature of about 90-95°C.
Step 8: Cool Completely
Transfer the baked bloomer to a wire cooling rack immediately. Allow it to cool completely before slicing-cutting into hot bread releases too much moisture and results in a gummy texture. The crust will crisp up beautifully as it cools.
Customization and Pairing Ideas for Your Bloomer Bread
1. Wholemeal Bloomer Variation
Replace up to 200g of the white bread flour with wholemeal or whole wheat flour for a nuttier, more substantial loaf. You may need to add an extra 20-30ml of water, as wholemeal flour absorbs more liquid. This creates a healthier version while maintaining the bloomer’s characteristic shape and texture.
2. Seeded Crust Enhancement
Before the second prove, brush your shaped loaf with a little water or beaten egg, then roll it in a mixture of sesame seeds, poppy seeds, sunflower seeds, or pumpkin seeds. This adds delightful crunch and visual appeal, transforming your bloomer bread recipe Paul Hollywood style into something even more artisanal.
3. Cheese and Herb Bloomer
After knocking back the dough in step 4, flatten it out and sprinkle with 100g grated mature cheddar and a tablespoon of chopped fresh rosemary or thyme. Roll up as directed. The cheese melts into pockets throughout the bread, creating a savory twist perfect for serving alongside soups or salads.
4. Classic British Ploughman’s Pairing
Slice your bloomer thickly and serve it as the centerpiece of a traditional ploughman’s lunch with mature cheddar, pickle, ham, apple slices, and a crisp salad. The mild flavor and sturdy texture of bloomer bread makes it ideal for holding hearty toppings without falling apart.
5. Perfect Sandwich Foundation
This Paul Hollywood bloomer bread creates exceptional sandwiches due to its soft crumb and structural integrity. Try it for bacon butties, prawn mayonnaise, egg and cress, or classic ham and mustard sandwiches. The slight chewiness holds fillings securely while the crust provides satisfying texture contrast.
6. Artisan Toast and Toppings Bar
Slice and toast your bloomer for breakfast or brunch, setting out various toppings: smashed avocado with chili flakes, ricotta with honey and figs, scrambled eggs with smoked salmon, or simply excellent butter and homemade jam. The bread’s neutral flavor profile complements both sweet and savory toppings beautifully.
7. Garlic Bread Transformation
Slice your cooled bloomer diagonally without cutting all the way through. Mix softened butter with crushed garlic, parsley, and a pinch of salt, then spread between each slice. Wrap in foil and warm in a 180°C oven for 15 minutes. Perfect alongside pasta dishes or as a party appetizer.
Expert Tips for Perfect Paul Hollywood Bloomer Bread
1. Water Temperature Matters for Proving Time
Using cool or room-temperature water (rather than warm) results in a slower fermentation that develops more complex flavors in your white bloomer bread recipe Paul Hollywood style. While warm water speeds up rising (useful when you’re short on time), cool water creates superior taste. In warmer kitchens, always opt for cool water to prevent over-proving.
2. The Windowpane Test Never Lies
After kneading, always perform the windowpane test to ensure proper gluten development. Take a golf-ball-sized piece of dough and gently stretch it between your fingers. If it stretches thin enough to see light through without tearing, your gluten is perfectly developed. If it tears, knead for another 2-3 minutes. This step is crucial for achieving the open, airy crumb structure.
3. Oil vs. Flour for Working Surface
Paul Hollywood specifically recommends oiling your work surface rather than flouring it when kneading and shaping. Flour can dry out your dough and create a tougher texture, while oil keeps it supple and soft. Use olive oil sparingly-just enough to prevent sticking without making the surface slippery.
4. Slash with Confidence and Speed
The slashes (or “cuts”) on top aren’t just decorative-they control where the bread expands during baking. Use a very sharp, serrated knife or a proper bread lame, and cut quickly and decisively at a 45-degree angle, about 1cm deep. Hesitant, sawing motions will drag and deflate your carefully proved loaf. Some bakers dip the blade in water between cuts for cleaner slashes.
5. Steam is Essential for Crust Development
The steam created by pouring water into the hot roasting tray serves two purposes: it keeps the outer surface of the dough moist during the first few minutes of baking (allowing maximum oven spring), and it contributes to that gorgeous, crispy, golden crust. Don’t skip this step-it’s what differentiates home-baked bread from professional bakery loaves.
6. Know Your Oven’s Hot Spots
All ovens have temperature variations. If your bloomer browns unevenly, rotate the tray 180 degrees halfway through baking. If the top browns too quickly before the loaf is fully baked, tent it loosely with foil for the final 10 minutes. An oven thermometer is invaluable for ensuring your actual temperature matches the dial.

7. Patience During Cooling Prevents Gumminess
This might be the hardest tip to follow because fresh bread smells absolutely irresistible, but cutting into your copycat Paul Hollywood bloomer bread recipe before it’s completely cool releases trapped steam, resulting in a gummy, dense texture. The crumb continues to set as it cools. Wait at least 45 minutes to an hour-your patience will be rewarded with perfect slices that showcase the bread’s true texture.
Storage and Reheating Guidance
Store your cooled bloomer in a bread box or paper bag at room temperature for up to 3 days-avoid plastic bags, which soften the crust. For longer storage, slice and freeze in an airtight bag for up to 3 months. Refresh day-old bloomer by spritzing with water and warming in a 180°C oven for 5-7 minutes to restore the crust’s crispness.
Common Queries and FAQs
Q: Why didn’t my bloomer rise properly during proving?
A: Several factors affect rising. Old or expired yeast won’t activate properly-always check the date. If your kitchen is too cold (below 20°C), the dough will rise very slowly; try proving in a warm spot like near a radiator or in an oven with just the light on. Conversely, if you added the salt directly to the yeast, it may have killed the yeast on contact-always keep them separated in the initial mix.
Q: Can I make this Paul Hollywood bloomer bread recipe with a stand mixer?
A: Absolutely! Use the dough hook attachment and mix on low speed for 2 minutes to combine, then increase to medium speed and knead for 5-7 minutes until the dough is smooth and elastic. This saves arm effort while achieving the same gluten development. Just be careful not to over-mix, which can warm the dough excessively.
Q: My bloomer spread sideways instead of rising up-what went wrong?
A: This usually indicates insufficient gluten development (knead longer next time) or over-proving during the second rise. When dough proves too long, it becomes weak and can’t hold its shape. The dough should only double, not triple, in size. Also ensure you’re creating enough tension when shaping-roll tightly and tuck the ends firmly.
Q: What’s the difference between a bloomer and a standard white loaf?
A: A bloomer is a specific type of British white bread characterized by its elongated, torpedo-like shape with diagonal slashes and a heavily floured crust. Unlike tin loaves baked in pans, bloomers are free-form loaves baked directly on a tray, which creates the distinctive thick, crispy crust all around. The shaping technique creates the signature look.
Q: Can I use instant yeast instead of fast-action dried yeast?
A: Yes, they’re essentially interchangeable in this recipe. Both can be mixed directly into the flour without pre-activating. If using traditional active dry yeast, you’ll need to dissolve it in a portion of the warm water first and wait 5-10 minutes until foamy before adding to the flour.
Q: Why is my bloomer crust too thick or too pale?
A: A too-thick, tough crust often results from insufficient steam in the oven-don’t skip the water tray step. A pale crust means the oven wasn’t hot enough or the baking time was too short. Ensure your oven is fully preheated to 220°C, and don’t reduce the temperature too early. Brushing with milk before baking also promotes deeper browning.
Q: How can I tell when my bloomer is fully baked without a thermometer?
A: The classic test is tapping the bottom of the loaf-it should sound hollow, like tapping a drum. The loaf should also feel light for its size and have a deep golden-brown color all over. If you’re unsure, it’s better to bake a few minutes longer than to underbake, which creates a dense, doughy center.
Paul Hollywood Bloomer Bread Recipe
Ingredients
- 500 g strong white bread flour
- 7 g sachet fast-action dried yeast
- 10 g fine sea salt
- 30 ml olive oil
- About 325ml cool or lukewarm water
- Flour polenta, or semolina for dusting the baking tray
Instructions
- In a large mixing bowl, add the 500g strong white bread flour. Place the yeast on one side of the flour and the salt on the opposite side-keeping them separated prevents the salt from killing the yeast. Pour in 30ml olive oil and start with 250ml of water.
- Using your hand or a wooden spoon, mix everything together, gradually adding more water (up to 75ml total) until the mixture forms a soft, slightly sticky dough that comes away from the bowl sides. The dough should feel tacky but manageable-resist adding all the water at once, as flour absorption varies.
- Lightly oil your work surface with olive oil (Paul prefers this over flouring, as it keeps the dough soft). Tip the dough out and knead vigorously for about 10 minutes. Use the heel of your palm to push the dough away from you, fold it back over itself, give it a quarter turn, and repeat. This develops the gluten structure. After 10 minutes, the dough should transform into a smooth, elastic ball that’s no longer sticky. Test readiness by stretching a small piece-it should form a thin, translucent “windowpane” without tearing.
- Place your kneaded dough into a lightly oiled bowl and cover with oiled clingfilm or a damp tea towel. Leave it in a warm, draft-free spot until it has at least doubled in size-this typically takes 1-3 hours depending on room temperature. For superior flavor development in this Paul Hollywood bread recipe bloomer, use cool water and allow a longer, slower rise. The dough is ready when you press it gently with a finger and the indent slowly springs back.
- Turn the risen dough onto a lightly oiled surface. Knock out the air by folding it over itself and pressing down several times until smooth. Flatten the dough into a rectangle with the long side facing you. Fold both long sides into the center so they overlap slightly, then roll the dough up tightly from the edge nearest you, like a Swiss roll. This creates tension for a good rise. Turn the roll seam-side down, tuck the ends underneath to create the characteristic bloomer shape (slightly tapered at the ends), and gently rock it back and forth to even out the shape.
- Transfer your shaped loaf to a baking tray that’s been dusted with flour, polenta, or semolina (this prevents sticking and adds texture). Cover loosely with a large plastic bag, oiled clingfilm, or tea towel, ensuring it won’t stick to the rising dough. Leave to prove until doubled in size again, typically 45-60 minutes. The loaf should look puffy and hold a gentle fingerprint when pressed.
- Preheat your oven to 220°C (fan 200°C)/gas mark 7. Place an empty roasting tray on the bottom shelf-this will create steam for a crispy crust. Once the loaf has proved, lightly spray it with water using a spray bottle. Dust generously with flour and gently rub it in with your hands for that rustic, artisan appearance that defines a proper bloomer.
- Using a very sharp serrated knife or bread lame, make 4-5 deep diagonal slashes across the top of the loaf at a 45-degree angle. Cut decisively and deeply (about 1cm) for the slashes to open beautifully. Place the loaf in the preheated oven, then immediately pour about 100ml of water into the hot roasting tray below to create steam (be careful of the hot steam).
- Bake for 20-25 minutes until deeply golden, then reduce the temperature to 200°C and bake for another 10-15 minutes if needed. The loaf is done when it sounds hollow when tapped on the bottom and reaches an internal temperature of about 90-95°C.
- Transfer the baked bloomer to a wire cooling rack immediately. Allow it to cool completely before slicing-cutting into hot bread releases too much moisture and results in a gummy texture. The crust will crisp up beautifully as it cools.
Video
Notes
Mastering this Paul Hollywood bloomer bread recipe is a true milestone in any home baker’s journey-it combines fundamental bread-making skills with professional shaping techniques to create a loaf that looks and tastes incredible.
The beauty of this bloomer bread recipe Paul Hollywood champions is its simplicity: quality ingredients, patient proving, and confident technique deliver consistently excellent results.
Whether you’re making sandwiches, toast, or simply tearing into a warm slice with butter, you’ll taste the difference that artisan methods make.
Now it’s time to dust your hands with flour, knead with purpose, and fill your kitchen with that unforgettable aroma of fresh-baked bread!
You can also follow us on Pinterest, and YouTube for more delicious updates and kitchen inspiration. Your feedback and support mean the world to us!